Trezor You Are Not in Bootloader Mode Please Try Again
If you own cryptocurrency, you are amidst an estimated viii% of the Usa population who does. Chances are that you go on your coins in a software wallet, either at an commutation like Coinbase or using 1 of the many open source options available similar Ethereum Wallet or Bitcoin Cadre. Some of you may take taken the next pace and bought a hardware wallet to secure your keys.
The Trezor One, Ledger Nano South, and KeepKey are among the most popular hardware wallets on the market today. While they each have distinct advantages in terms of their architectures and the currencies they support, they all serve to store your individual keys securely. Hardware wallets allow you to sign transactions directly on the device so that your keys are never exposed outside of the device. The advantage of this approach is that fifty-fifty if a hacker compromises your desktop system, they will not be able to get access to your crypto stash or interfere with your crypto transactions.
I recently bought a Trezor One. Afterward transferring some currency to the wallet, however, I rapidly realized there was fiddling fun to be had with these devices autonomously from the initial currency transfer. There'due south no point in carrying these wallets around town with you, because cryptocurrency infrastructure is pretty much non-existent at this time. So, hardware wallets sit unused on shelves or in a safes, quietly protecting keys and coins from harm.
Only that's tedious. What else could nosotros do with all these hardware wallets? How about some gaming! Given all that crypto has taken from the gaming community — driving up GPU prices past hoarding for mining rigs — information technology'southward fourth dimension crypto gave something back.
Ladies and gentlemen, I present to y'all an ageless archetype running on the Trezor I: Pong.
While the brandish is rather small and at that place are only ii buttons, The Trezor One is still a fun little device for learning how to program embedded devices. The processor is the STMicro STM32F205, which has an ARM 32-bit Cortex-M3 CPU. There's about 1MB of flash storage bachelor and 128KB of RAM. The device has a 128×64 bit OLED brandish and two buttons.
If you'd similar to write your own firmware for the Trezor 1, here are some instructions to get you started.
Setting up the Build Environment
These instructions presume yous're running Ubuntu eighteen.04 LTS, but with a niggling tweaking they'll piece of work on whatsoever box. These steps work confronting version v1.half-dozen.two of the firmware.
Go the Trezor Source Code
First step is to download the Trezor source code.
$ mkdir workspace
$ cd workspace
$ git clone https://github.com/trezor/trezor-mcu.git
Install the Dependencies
Next, yous'll need to install all the dependencies required to build.
sudo apt install build-essential python python-pip libsdl2-dev
Download and extract the GNU ARM Embedded Toolchain.
$ cd workspace
$ tar -xjf ~/Downloads/gcc-arm-none-eabi-seven-2018-q2-update-linux.tar.bz2
$ echo "consign PATH=~/workspace/gcc-arm-none-eabi-7-2018-q2-update/bin:$PATH" >> ~/.bashrc
$ source ~/.bashrc
You'll also need to install Google Protocol Buffers. Unfortunately, the packages provided by Ubuntu are too outdated, and so yous'll need to become the latest version on your own here.
$ cd workspace
$ mkdir protoc
$ cd protoc
$ wget https://github.com/google/protobuf/releases/download/v3.6.0/protoc-3.half dozen.0-linux-x86_64.zip
$ unzip protoc-3.6.0-linux-x86_64.goose egg
$ echo "export PATH=~/workspace/protoc/bin:$PATH" >> ~/.bashrc
$ source ~/.bashrc
Finally, install a few Python modules.
$ pip install protobuf ecdsa
Build the Firmware
Now that you've got all the dependencies installed, you're fix to build the firmware. To build the firmware:
$ cd ~/workspace/trezor-mcu
$ ./script/setup
$ ./script/cibuild
The freshly built image will be stored at firmware/trezor.bin. We'll discuss what to exercise with that image a petty later on.
Trezor Emulator
If you plan to create your own Trezor firmware, chances are that you won't get it correct the offset time you try it out. To shorten the alter code/build/load cycle, you tin can use the Trezor emulator to examination out your changes without having to actually load the firmware on the device.

Here's a screenshot of the emulator running. The 128×64 OLED display appears in its ain window. The buttons are simulated by Left-Arrow and Right-Arrow key presses.

To build the emulator, yous need to fix some surroundings variables and run the setup script again to clear out any previous build artifacts.
$ cd ~/workspace/trezor-mcu
$ consign EMULATOR=1 TREZOR_TRANSPORT_V1=1
$ ./script/setup
$ ./script/cibuild
The emulator executable shows up in the firmware directory and can exist run like this:
$ ./firmware/trezor.elf
Customizing the Firmware
Okay, now you're all setup to build the device firmware and the emulator, and so y'all're ready to create your own Trezor firmware!
The entry point into the Trezor app firmware is found in the main function in firmware/trezor.c. You can simply delete everything subsequently the initialization in that function and start writing your own code.
Cartoon to the Display
1 of the first things y'all'll want to do is draw to the brandish. The Trezor display is a 128×64 OLED, where the pixel (0,0) is at the top left corner of the screen. The brandish chip hardware is attainable via the SPI bus (see oled.c), just you lot won't need to interact straight with the hardware. The Trezor firmware provides a elementary API in oled.h for cartoon and press to the display.
The display API is contained in oled.h and is very straightforward.
#define OLED_WIDTH   128
#define OLED_HEIGHT  64
#define OLED_BUFSIZE (OLED_WIDTH * OLED_HEIGHT / 8) void oledInit(void);
void oledClear(void);
void oledRefresh(void);
void oledSetDebugLink(bool ready);
void oledInvertDebugLink(void);
void oledSetBuffer(uint8_t *buf);
const uint8_t *oledGetBuffer(void);
void oledDrawPixel(int x, int y);
void oledClearPixel(int x, int y);
void oledInvertPixel(int ten, int y);
void oledDrawChar(int ten, int y, char c, int zoom);
int oledStringWidth(const char *text, int font);
void oledDrawString(int x, int y, const char* text, int font);
void oledDrawStringCenter(int y, const char* text, int font);
void oledDrawStringRight(int ten, int y, const char* text, int font);
void oledDrawBitmap(int x, int y, const BITMAP *bmp);
void oledInvert(int x1, int y1, int x2, int y2);
void oledBox(int x1, int y1, int x2, int y2, bool set);
void oledHLine(int y);
void oledFrame(int x1, int y1, int x2, int y2);
void oledSwipeLeft(void);
void oledSwipeRight(void);
For case, to draw a pixel at a certain position (x,y):
oledDrawPixel(x,y);
Drawing bitmaps is elementary too one time you sympathise the format of the information required. The oledDrawBitmap function takes a pointer to a BITMAP construction, which looks like this:
typedef struct {
                uint8_t width, acme;
                const uint8_t *data;
} BITMAP;
The "width" and "height" fields specify the dimensions of the prototype. The "data" array consists of the pixel data starting with the upper left corner of the paradigm. Each byte represents viii pixels with the least significant chip position corresponding to the leftmost pixel (i.e., niggling endian). The fleck value 1 means white and 0 ways black. If you want to display standard Windows bitmap files, yous'll take to do 2 things.
First, you'll need to scale the image downward to the 128×64 size display. You lot can do that with an image editor similar Gimp, or fifty-fifty more easily with the catechumen utility on Linux:
convert title.bmp -resize 128x64 title_resize.bmp
The second footstep is to convert the bitmap file to a C assortment usable by the Trezor display API. I wrote a script to convert standard Windows bitmap files to the C array format used past the Trezor API. The input bitmap must be in 24-bit way, which ways that each pixel is stored as three bytes, i byte for each color (red, green, and blue). The script converts the center byte (green) to either 0 or 1 since the Trezor brandish is black and white. You tin can observe the Python script called bmp2trz.pyhither.

Reading Buttons
The Trezor has two buttons which are referred to as "Yes" and "No". The button API is exposed in buttons.h. There is a global variable holding the push button state called "button", and this structure has the following fields:
struct buttonState {
                volatile bool YesUp;
                volatile int YesDown;
                volatile bool NoUp;
                volatile int NoDown;
};
In that location are two ways to read the button state. You tin can either check to run across if the push button is currently held downwards, or you tin can cheque to run into if the push was pressed and released.
Before reading from the global push button variable, first call "buttonUpdate" to update the state. Then you tin can simply test the global button variable fields direct. For example, here's some instance code to expect indefinitely for either button to exist pressed:
do
{
                filibuster(100000);
                buttonUpdate();
} while (!button.YesUp && !button.NoUp);
Installing the Firmware
To load your custom firmware onto the device, yous first need to get the device into bootloader mode. Bootloader manner is entered by pressing and holding both buttons downwards as you plug in the Trezor to the USB port. When yous're in bootloader mode, the screen appears similar this:
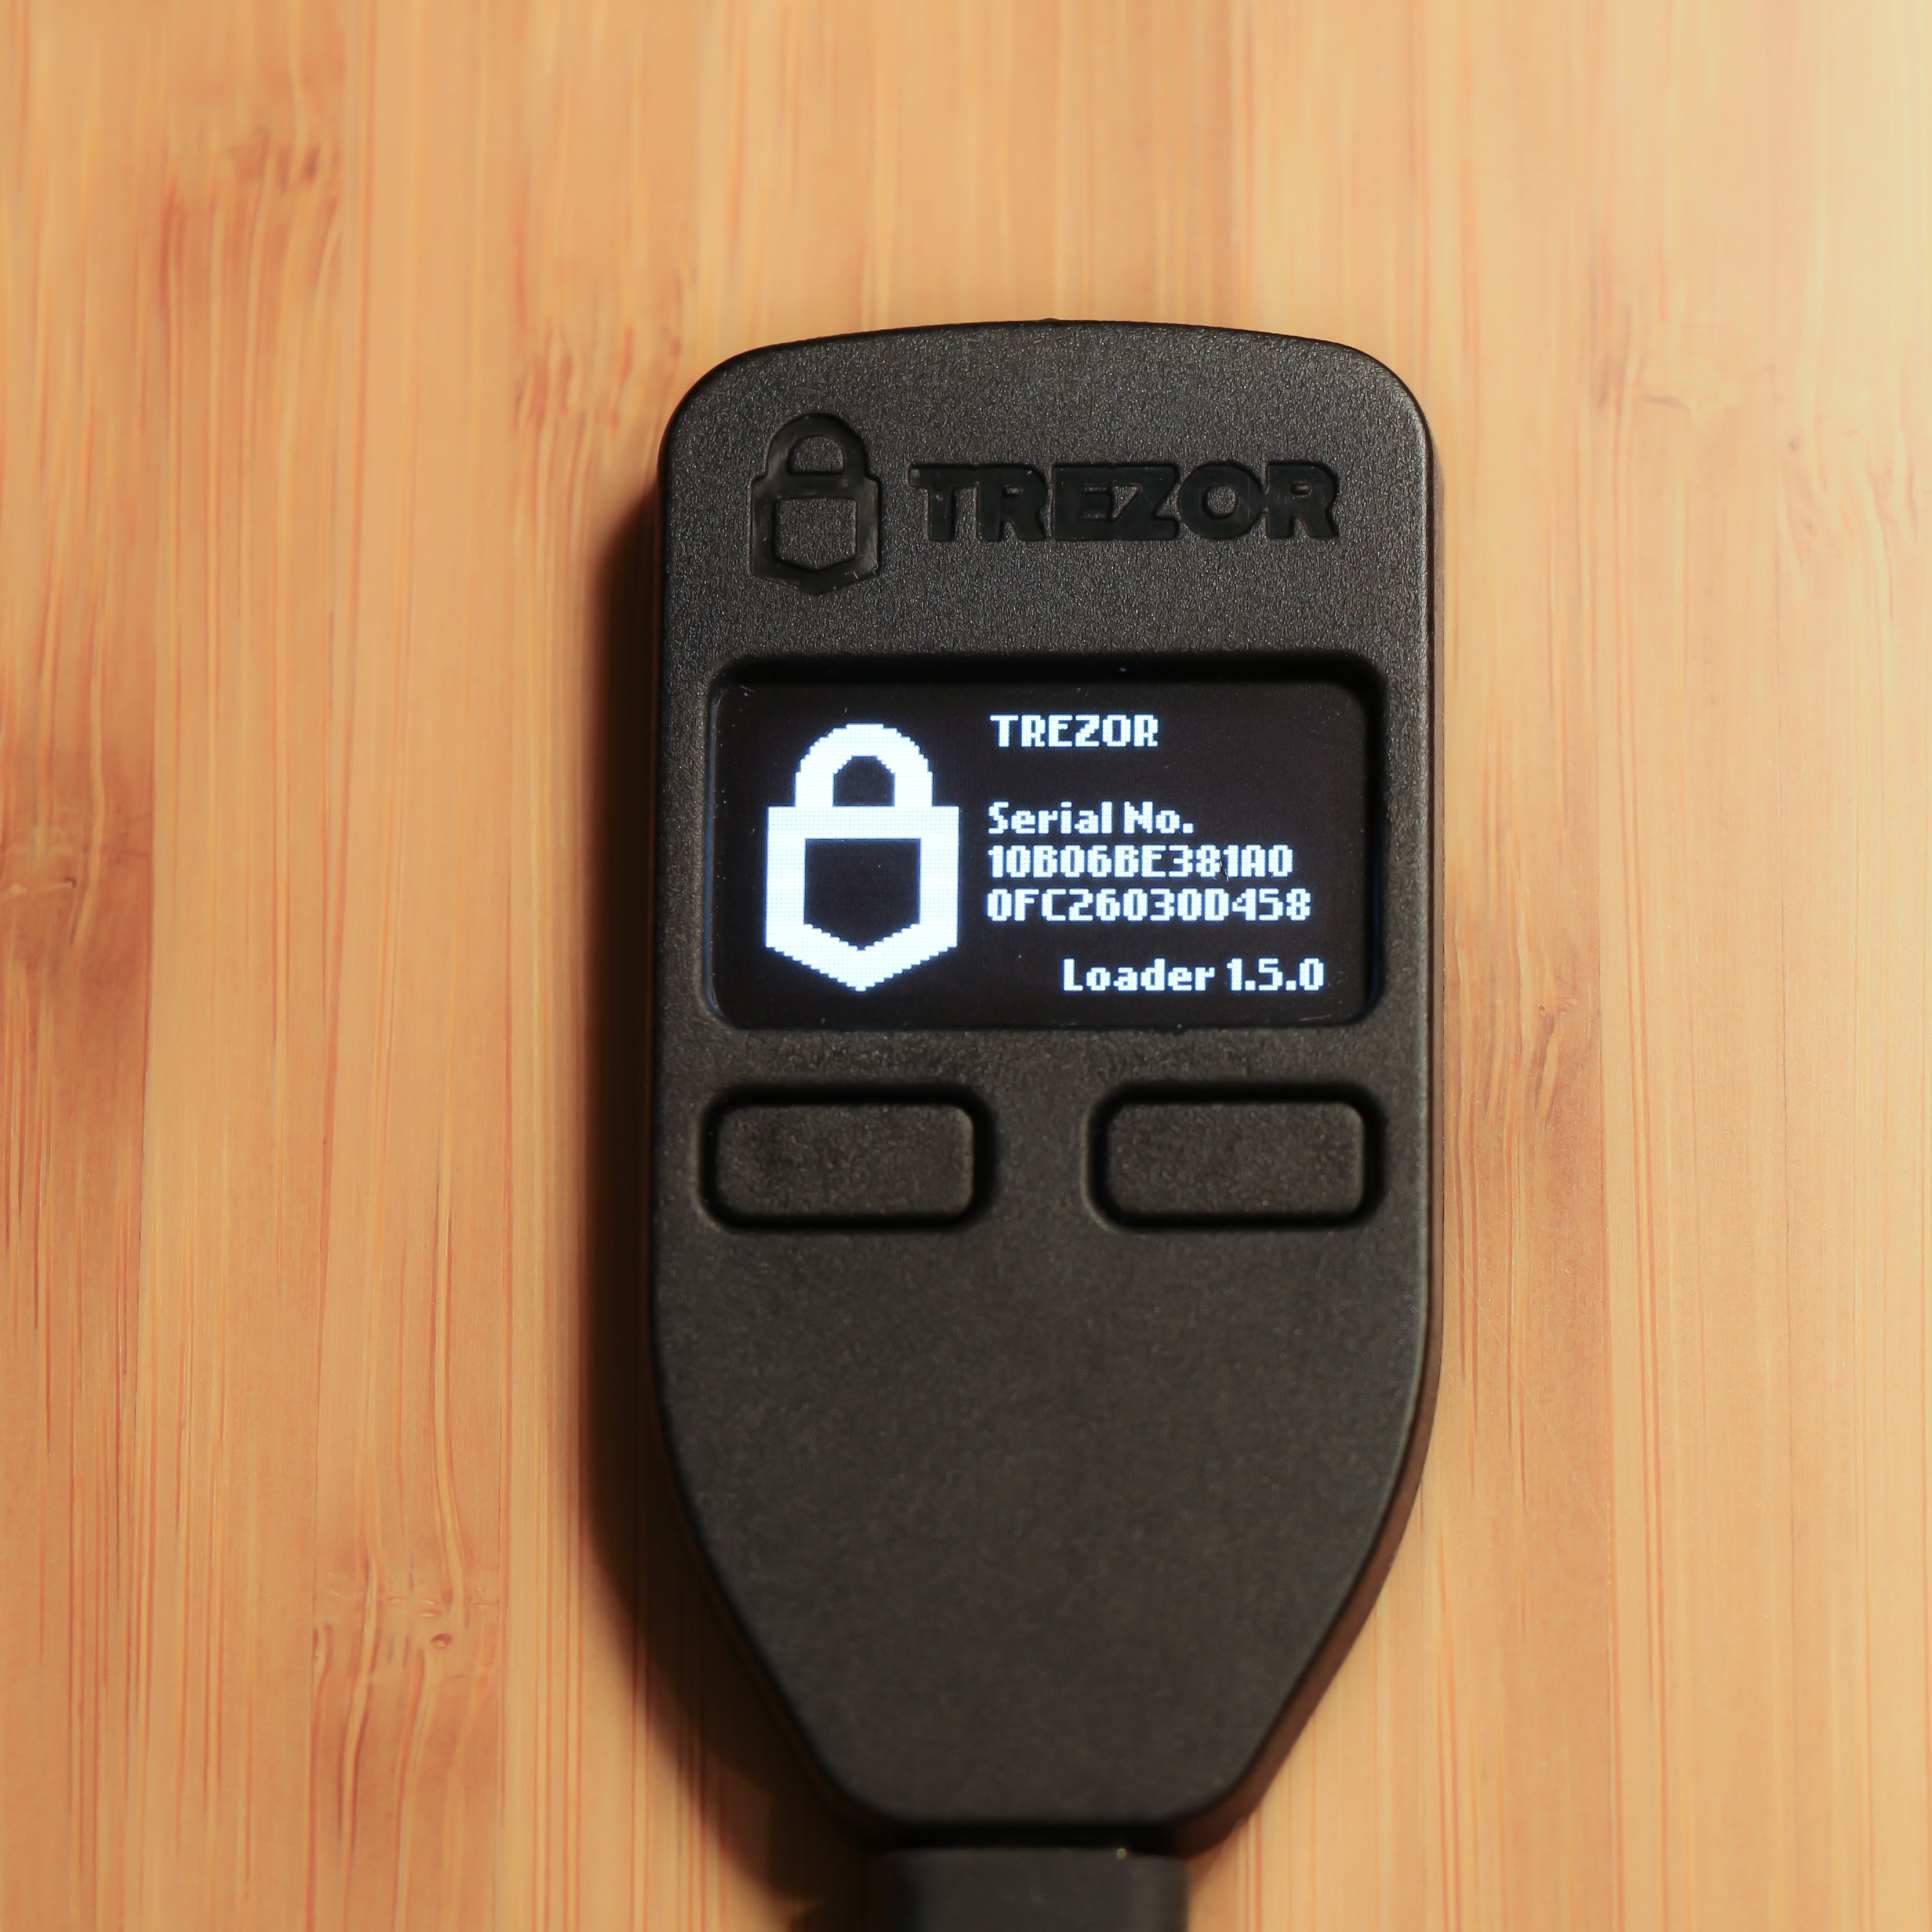
With the Trezor in bootloader style, you lot can upload your custom firmware image using the trezorctl utility. To install the trezorctl utility, you'll need to install the post-obit:
$ sudo apt-get install python3-dev python3-pip cython3 libusb-1.0-0-dev libudev-dev
$ pip3 install --upgrade setuptools
$ pip3 install trezor[hidapi]
Then you can install your firmware as shown below.
Be careful at this step! This functioning will completely erase the image along with any keys you lot take setup on the device. Do non go along if you accept significant value stored in your wallet and you lot are unsure of what yous are doing. I recommend yous double check that you have your seed words safely stored on paper before loading new firmware onto the device if you actually have whatsoever currency stored on your wallet.
$ trezorctl firmware_update -f firmware/trezor.binFirmware fingerprint: f5392f9b390b6381bfaa24a39a7ed0f7eba2e9cbfa21b9c224ce500b38918766Please confirm activeness on device...
Yous'll accept to admit that you desire to go ahead and erase the electric current image and load a new firmware epitome onto the device.
Here's a video showing the upgrade process.
To be clear, during the upgrade process and on every subsequent boot thereafter, the bootloader detects that the upgrade paradigm is not signed past Satoshi Labs and prompts the user if they would like to go along with the unsigned firmware.
If you would like to become Pong running on your Trezor, you don't accept to implement the game from scratch if you lot don't want to. At that place's a fairly simple implementation on github by user flightcrank which you can find here. I already ported that version to the Trezor with minimal changes, so if y'all'd like to outset with my port of flightcrank's Pong implementation to the Trezor One, you can discover that code here.

Happy coding!
Source: https://syscall7.com/hacking-a-hardware-wallet/
0 Response to "Trezor You Are Not in Bootloader Mode Please Try Again"
Enviar um comentário